
You want dessert that satisfies your sweet tooth and your protein goals. These 12 best high protein desserts are tested for real flavor, texture, and nutrition so you don't have to sacrifice taste for macros.
Inside you'll find cakes, bars, frozen treats, and quick mug recipes that use ingredients like Greek yogurt, protein powder, beans, cottage cheese, and nut butter. Each recipe lists exact ingredients, clear steps, and sensible timing so you can make them at home with confidence.
Whether you want a post-workout treat, a make-ahead snack, or an elegant dessert to share, these high protein desserts deliver rich flavors and satisfying textures. Pin your favorites, try one tonight, and enjoy dessert that helps you hit your protein target.
1. High Protein Chocolate Peanut Butter Brownies

This brownie is fudgy, dense, and rich with chocolate and peanut butter flavor. It uses black beans and whey protein for a surprising protein boost and velvet texture. The peanut butter swirls add creaminess and a salty contrast to deep cocoa notes.
It fits casual nights in, post-workout treats, or box lunches. You’ll love it if you like dense brownies with nutty highlights. Expect a fudgy mouthfeel and a glossy top that snaps when you lift a square.
Prep: 15 minutes | Bake: 25–28 minutes | Yields 9 brownies
Ingredients
- 1 (15 oz) can black beans, drained and rinsed
- 2 large eggs, room temperature
- 1/2 cup natural peanut butter, smooth, room temperature
- 1/4 cup unsweetened applesauce
- 1/3 cup honey or maple syrup
- 1/3 cup unsweetened cocoa powder
- 1/2 cup chocolate whey protein powder
- 1 tsp pure vanilla extract
- 1/2 tsp baking powder
- 1/4 tsp fine sea salt
- 2 tbsp dark chocolate chips (optional, for top)
Instructions
- Preheat oven to 350°F (175°C). Line a 8×8-inch pan with parchment, leaving an overhang.
- Place black beans, eggs, peanut butter, applesauce, honey, and vanilla in a blender or food processor. Puree until completely smooth.
- Add cocoa powder, protein powder, baking powder, and salt. Pulse until well combined and glossy. Batter should be thick but spoonable.
- Spoon half the batter into the prepared pan. Smooth the top with a spatula.
- Dollop remaining batter and swirl with peanut butter using a knife for a marbled effect. Sprinkle with chocolate chips if using.
- Bake 25–28 minutes until a toothpick inserted near center comes out with a few moist crumbs. Edges should be set and slightly pulling away.
- Cool in pan at least 30 minutes. Use parchment overhang to lift brownies. Cool another 15 minutes on a rack for cleaner slices.
- Cut into 9 squares. Store in an airtight container up to 4 days in the fridge.
How to Serve It
Serve warm or chilled on a small plate. Garnish with a light drizzle of melted peanut butter and flaky sea salt. Pair with a cold glass of milk or an espresso. Store leftovers in the fridge for fudgy texture. These brownies freeze well—wrap squares individually for up to 2 months. Perfect for lunchboxes or a protein-packed dessert after workouts.
2. Greek Yogurt Berry Parfait with Granola (High Protein Dessert)

This parfait highlights creamy Greek yogurt layered with tart berries and crunchy granola for contrast. It's quick, bright, and naturally high in protein thanks to the yogurt and a scoop of unflavored whey or plant protein.
It’s ideal for morning treats, snack-time dessert, or a light after-dinner sweet. You’ll enjoy tangy yogurt, juicy berries, and toasted granola crunch. Aromatic fresh lemon zest lifts the flavors.
Prep: 10 minutes | No bake | Yields 2 servings
Ingredients
- 2 cups plain Greek yogurt (2% or 0%), cold
- 1 scoop (about 30 g) vanilla whey protein powder
- 1 tbsp honey, plus extra for drizzling
- 1 tsp lemon zest
- 1 cup mixed berries (strawberries, blueberries, raspberries), washed
- 1/2 cup low-sugar granola
- 2 tbsp chia seeds
- 1/4 cup sliced almonds, toasted
- Fresh mint leaves for garnish
- Optional: 1 tsp vanilla extract
Instructions
- In a bowl, stir Greek yogurt, protein powder, honey, lemon zest, and vanilla until smooth.
- Taste and adjust sweetness with more honey if needed.
- In two clear glasses, spoon 2 tbsp yogurt mixture as the first layer.
- Add 1/4 cup mixed berries on top of yogurt layer.
- Add 2 tbsp granola and a sprinkle of chia seeds.
- Repeat layers until glasses are filled, finishing with granola and berries on top.
- Garnish with toasted almonds and mint leaves.
- Serve immediately for crunch, or chill 15–30 minutes for slightly softer granola.
How to Serve It
Serve in clear glasses to show the layers. Drizzle a little extra honey and add a mint sprig. Pair with herbal tea or cold brew coffee. Store covered in the fridge up to 24 hours (granola will soften). For make-ahead, keep granola separate until serving. Great for brunch, picnics, or an easy protein dessert.
3. Flourless Chocolate Protein Mug Cake

This single-serve mug cake is rich, chocolatey, and ready in minutes. It uses protein powder and almond flour for a dense, cake-like crumb. It’s a fast satisfying option for a high-protein dessert craving.
Perfect for solo treats, late-night sweets, or portion control. You’ll taste deep cocoa with a slightly nutty finish. The cake is warm, soft, and slightly gooey in the center.
Prep: 5 minutes | Cook: 90 seconds microwave | Yields 1 serving
Ingredients
- 3 tbsp almond flour
- 1 tbsp cocoa powder
- 1 scoop (about 30 g) chocolate whey protein powder
- 1/4 tsp baking powder
- 1 tbsp coconut sugar or brown sugar
- 1 large egg, room temperature
- 1 tbsp milk (dairy or plant)
- 1 tbsp melted coconut oil, cooled to warm
- 1/4 tsp vanilla extract
- Pinch of fine sea salt
- Optional: 1 tbsp dark chocolate chips
Instructions
- Lightly grease a microwave-safe mug or ramekin.
- In a small bowl, whisk almond flour, cocoa powder, protein powder, baking powder, sugar, and salt.
- Add egg, milk, melted coconut oil, and vanilla. Mix until smooth and uniform.
- Stir in chocolate chips if using.
- Pour batter into prepared mug. Smooth top gently.
- Microwave on high for 75–90 seconds. Cake should rise and the top look set. Doneness: a toothpick inserted near center should come out mostly clean or with moist crumbs.
- Let cake rest 1 minute before carefully removing.
- Cool 2–3 minutes then top with fresh berries or Greek yogurt.
How to Serve It
Serve warm in the mug or unmold onto a plate. Add a dollop of Greek yogurt or a scoop of protein ice cream. Sprinkle with cocoa or chopped nuts. Eat immediately for best texture. For make-ahead, refrigerate batter up to 24 hours and microwave when ready. Great for quick, single-serving high protein desserts.
4. High Protein Lemon Ricotta Bars
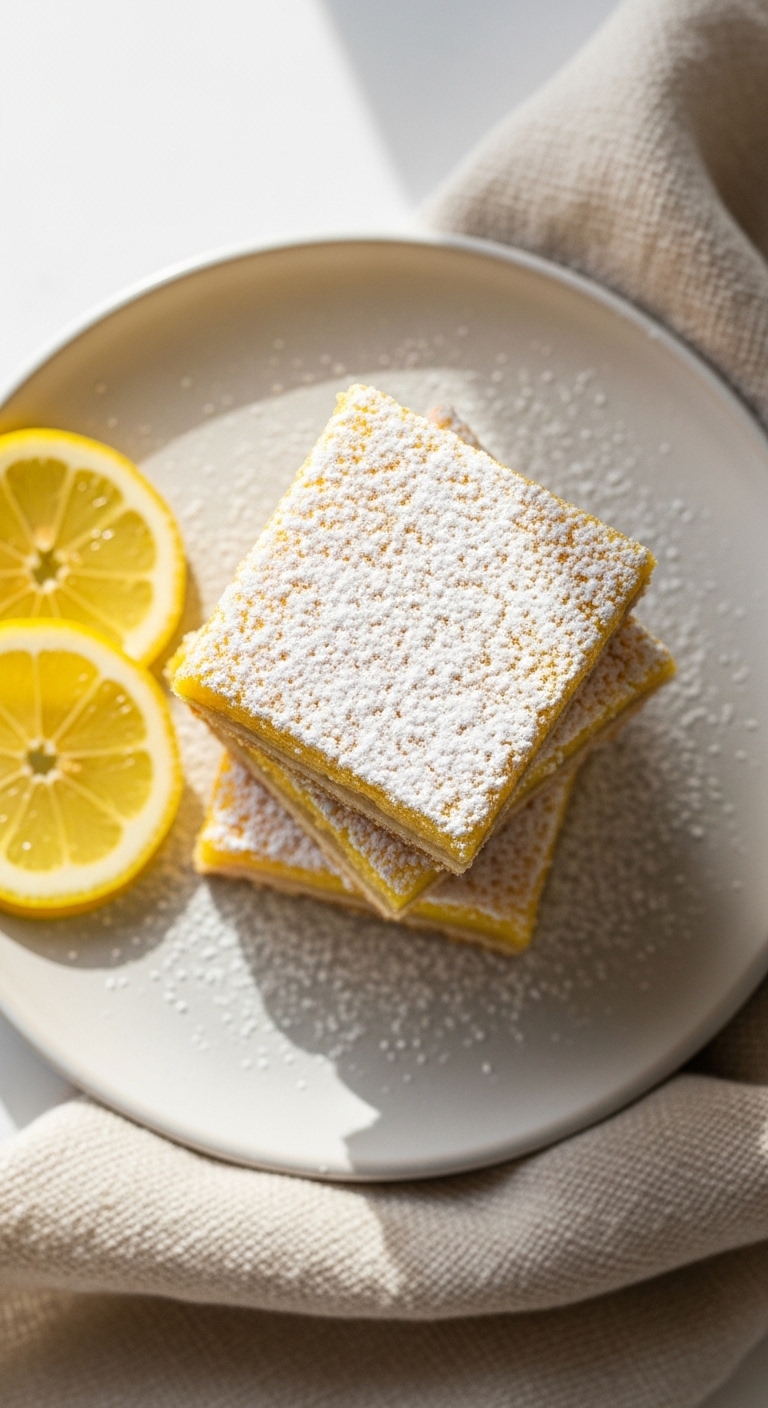
These lemon ricotta bars are bright, creamy, and subtly sweet with a protein boost from ricotta and vanilla protein powder. The shortbread-like base balances the zesty lemon custard. They cut clean and feel light.
They work for spring gatherings, afternoon tea, or a lighter dessert option. You’ll notice citrus tang, silky ricotta, and a tender crumb. The aroma of lemon zest fills the kitchen as they bake.
Prep: 20 minutes | Bake: 30–35 minutes | Yields 12 bars
Ingredients
- 1 1/4 cups all-purpose flour
- 1/3 cup granulated sugar
- 1/2 cup unsalted butter, cold and cubed
- 1/8 tsp fine sea salt
- 1 cup part-skim ricotta cheese, cold
- 1/2 cup Greek yogurt (plain), cold
- 1/3 cup granulated sugar (for filling)
- 1 scoop (about 30 g) vanilla protein powder
- 2 large eggs, room temperature
- 2 tbsp fresh lemon juice
- 1 tbsp lemon zest
- Optional: powdered sugar for dusting
Instructions
- Preheat oven to 350°F (175°C). Line a 9×9-inch pan with parchment.
- Make crust: In a bowl, combine flour, 1/3 cup sugar, and salt. Cut in cold butter with a pastry cutter until coarse crumbs form.
- Press crust firmly and evenly into the bottom of the pan. Bake 12–14 minutes until light golden. Remove from oven and reduce temperature to 325°F (160°C).
- Meanwhile, make filling: In a mixer or bowl, blend ricotta, Greek yogurt, 1/3 cup sugar, protein powder, eggs, lemon juice, and zest until smooth and slightly airy.
- Pour filling over warm crust. Smooth the top with a spatula.
- Bake 18–22 minutes until edges are set and center jiggles slightly when nudged. Doneness: center should be nearly set; a toothpick near center comes out mostly clean.
- Cool completely in pan at least 1 hour, then chill 2 hours to firm up.
- Lift from pan, dust with powdered sugar if desired, and cut into 12 squares.
How to Serve It
Serve chilled or at cool room temperature. Garnish with thin lemon slices and fresh mint. Pair with green tea or a citrusy white wine. Store in the fridge up to 5 days. For make-ahead, bake and chill up to 48 hours before serving. Great for showers or spring dessert spreads.
5. Cottage Cheese Chocolate Mousse (High Protein Dessert)

This mousse uses cottage cheese and cocoa for a velvety, protein-rich dessert. It’s lighter than cream-based mousses but still decadent. A touch of espresso deepens the chocolate flavor.
It’s perfect for portion-controlled indulgence or a post-dinner treat. You’ll get silky texture, rich chocolate, and a hint of coffee. The mousse is airy yet substantial.
Prep: 10 minutes | Chill: 30 minutes | Yields 4 small servings
Ingredients
- 1 1/2 cups small-curd cottage cheese, cold
- 1/3 cup unsweetened cocoa powder
- 2 tbsp maple syrup or honey
- 1 tsp instant espresso powder
- 1/2 tsp vanilla extract
- 2–3 tbsp milk, as needed for texture
- 2 tbsp dark chocolate, finely chopped (optional garnish)
- Pinch of fine sea salt
- 2 tbsp unsweetened cocoa nibs or chopped nuts for topping
- Fresh berries for serving
Instructions
- Place cottage cheese, cocoa powder, maple syrup, espresso powder, vanilla, and salt in a blender.
- Blend on high until very smooth. If too thick, add milk 1 tbsp at a time to reach desired mousse consistency.
- Taste and adjust sweetness or espresso as needed.
- Spoon mousse into four small serving glasses or ramekins.
- Chill at least 30 minutes to let flavors meld and texture set.
- Before serving, top with chopped dark chocolate and cocoa nibs or nuts.
- Keep chilled until ready to serve. Store in the fridge up to 3 days.
How to Serve It
Spoon into small glasses and add a few fresh raspberries on top. Pair with a mint sprig and a short espresso. Store in airtight containers in the fridge. For make-ahead, blend and chill up to 48 hours. A light, protein-rich dessert for weeknights or dinner parties.
6. Chickpea Blondies with Almonds and Sea Salt
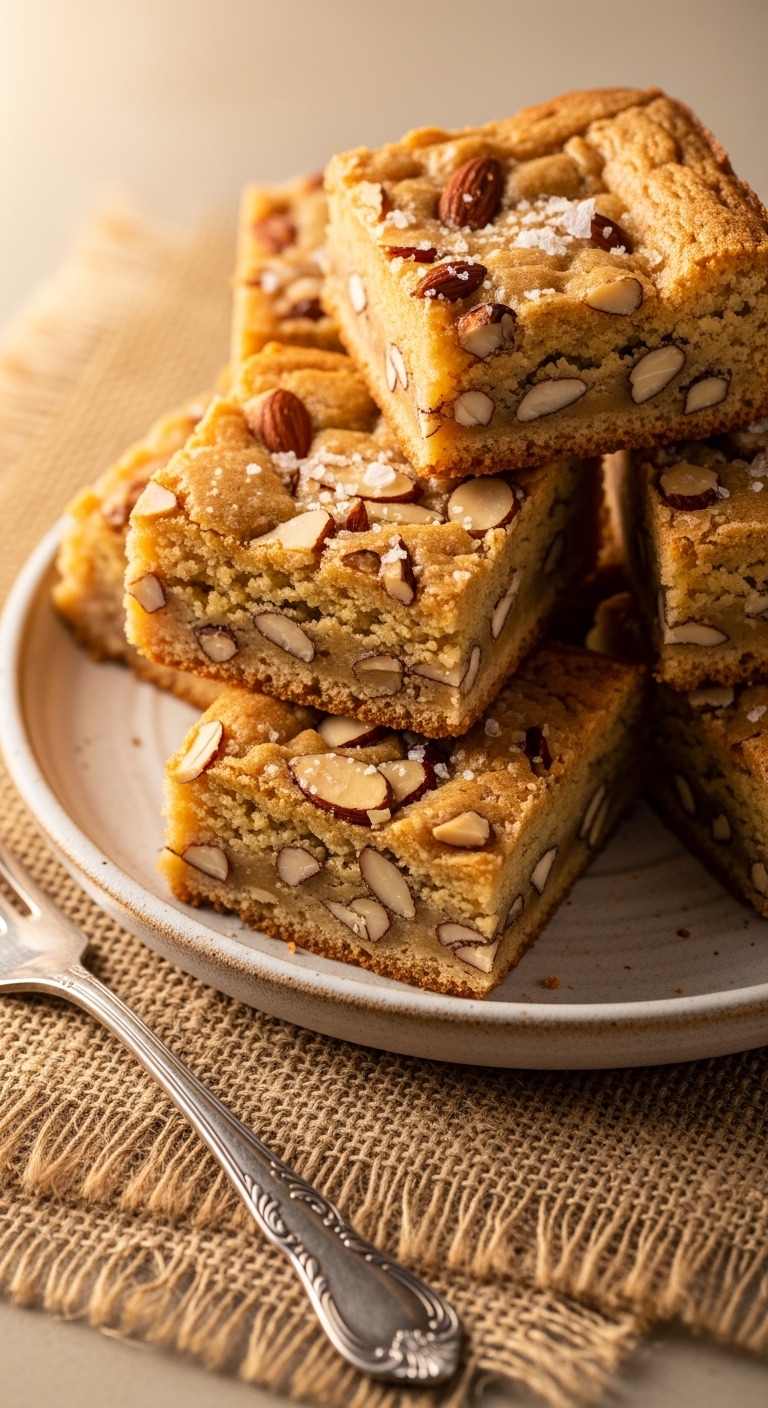
These blondies use canned chickpeas for a moist, chewy texture and added protein. They taste like brown butter and vanilla with nutty almond bites. They're gluten-free-friendly if you use certified GF oats.
They work for lunchbox sweets, snack-time desserts, or a baked-after-work treat. You’ll get chewy edges, tender centers, and a toasty almond crunch. Aromas of vanilla and browned butter fill the kitchen.
Prep: 15 minutes | Bake: 22–25 minutes | Yields 12 bars
Ingredients
- 1 (15 oz) can chickpeas, drained and rinsed
- 2 large eggs, room temperature
- 1/3 cup almond butter, smooth, room temperature
- 1/4 cup maple syrup
- 1/4 cup coconut sugar
- 2 tsp vanilla extract
- 1/2 cup oat flour (or ground oats)
- 1/4 cup almond flour
- 1/2 tsp baking powder
- 1/4 tsp fine sea salt
- 1/3 cup sliced almonds, plus extra for topping
- Optional: 2 tbsp dark chocolate chips
Instructions
- Preheat oven to 350°F (175°C). Line a 9×9-inch pan with parchment.
- In a blender, process chickpeas until smooth. Scrape down sides as needed.
- Add eggs, almond butter, maple syrup, coconut sugar, and vanilla. Blend until uniform.
- Transfer to a bowl. Stir in oat flour, almond flour, baking powder, salt, and sliced almonds. Fold until combined. Add chocolate chips if using.
- Spread batter evenly in prepared pan. Smooth top and sprinkle extra almonds and a pinch of flaky sea salt.
- Bake 22–25 minutes until top is golden and a toothpick inserted comes out with moist crumbs. Edges should be lightly browned.
- Cool 20 minutes in pan, then chill 30 minutes for cleaner slices.
- Cut into 12 bars. Store in fridge up to 5 days.
How to Serve It
Serve at room temperature or slightly chilled. Garnish with a drizzle of melted almond butter and extra flaky salt. Pair with herbal tea or a cold latte. Store in the fridge for longer shelf life; freeze individually wrapped bars for up to 2 months. Great for snacks, picnics, or mid-afternoon protein desserts.
7. High Protein No-Churn Vanilla Ice Cream
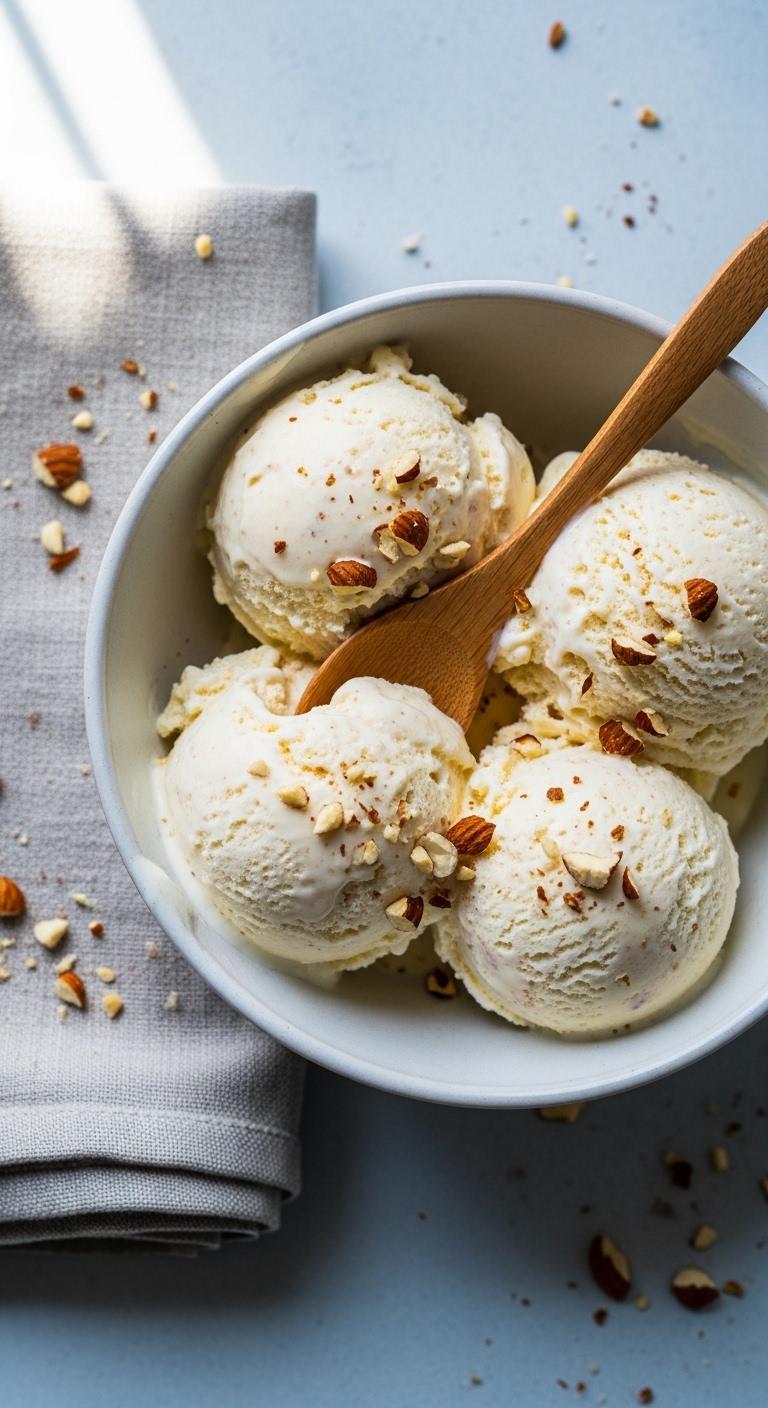
This no-churn ice cream uses Greek yogurt and vanilla protein powder for a creamy frozen dessert with more protein. It’s simple, scoopable, and tastes like classic vanilla with a tangy yogurt finish.
It’s ideal for summer nights or anytime you want frozen high protein desserts that are quick to make. Expect a smooth, slightly tangy texture with fragrant vanilla beans. It scoops well after freezing.
Prep: 10 minutes | Freeze: 4–6 hours | Yields about 1 quart
Ingredients
- 2 cups plain Greek yogurt (2% or full-fat), cold
- 1 1/2 cups heavy cream, cold
- 1/3 cup honey or maple syrup
- 1 scoop (about 30 g) vanilla protein powder
- 1 tsp vanilla extract
- 1 vanilla bean, seeds scraped (or 1 tsp vanilla extract)
- Pinch of fine sea salt
- Optional: 1/2 cup chopped roasted almonds or cookie pieces
- Optional: 1 tbsp vodka (prevents hard freezing)
Instructions
- In a large bowl, whisk Greek yogurt, honey, protein powder, vanilla seeds, vanilla extract, and salt until smooth.
- In a chilled bowl, whip heavy cream to soft peaks.
- Fold whipped cream gently into yogurt mixture until fully combined and airy.
- Stir in chopped almonds or mix-ins if using.
- Pour mixture into a freezer-safe loaf pan or container. Smooth the top.
- Cover tightly and freeze 4–6 hours until solid. For scoopable texture, add 1 tbsp vodka to base to keep softer.
- When ready, let sit at room temperature 3–5 minutes before scooping for easier serving.
- Store in freezer up to 2 weeks for best texture.
How to Serve It
Scoop into bowls and garnish with toasted almonds, fresh berries, or a sprinkle of cinnamon. Pair with espresso or a fruit salad. Freeze in small portions for grab-and-go protein desserts. For a sundae, add a drizzle of dark chocolate sauce. Let frozen ice cream soften slightly before scooping for the best texture.
8. Peanut Butter Protein Cups (Homemade)

These peanut butter cups are rich, creamy, and packed with protein from peanut butter and protein powder. They’re less sweet than store-bought versions and have a pleasant peanut-chocolate contrast.
They work well for grab-and-go snacks, post-workout treats, or party bites. You’ll taste roasted peanut butter and bittersweet chocolate with a silky center. The cups have a satisfying snap.
Prep: 15 minutes | Chill: 1 hour | Yields 12 cups
Ingredients
- 1 cup natural peanut butter, room temperature
- 2 tbsp coconut oil, melted and slightly cooled
- 2 tbsp maple syrup
- 1/3 cup chocolate or unflavored whey protein powder
- 1/2 tsp fine sea salt
- 8 oz dark chocolate, chopped
- 1 tsp coconut oil (for chocolate)
- 12 silicone or paper liners
- Optional: coarse sea salt for sprinkling
Instructions
- Line a mini muffin tin with 12 liners.
- In a bowl, stir peanut butter, melted coconut oil, maple syrup, protein powder, and salt until smooth.
- Melt dark chocolate with 1 tsp coconut oil in a double boiler or microwave in 20-second bursts, stirring between.
- Spoon 1 tsp melted chocolate into each liner, tilting to coat bottom. Freeze 5 minutes to set.
- Add 1 tbsp peanut butter mixture into each cup. Smooth surface.
- Top each with remaining melted chocolate to seal. Sprinkle coarse salt if desired.
- Freeze 30–45 minutes until firm. Doneness: chocolate should be set and not soft to touch.
- Store in an airtight container in the fridge up to 2 weeks or freezer for longer.
How to Serve It
Serve chilled or slightly softened at room temperature for creaminess. Pair with cold milk or a small espresso. Keep stored in the fridge for firm cups. These are perfect for party platters or homemade gifts. Make a double batch and freeze for easy protein desserts anytime.
9. Black Bean Brownie Bites with Walnuts

These mini brownies use black beans and oats for a fudgy, high-protein bite. They’re portion-controlled and studded with walnuts for crunch. The texture is moist with a deep chocolate taste.
They’re great for snack boxes, dessert trays, or a quick sweet finish. You’ll taste dark cocoa and toasted walnut notes. The bites are dense but tender.
Prep: 15 minutes | Bake: 18–20 minutes | Yields 24 bites
Ingredients
- 1 (15 oz) can black beans, drained and rinsed
- 2 eggs, room temperature
- 1/3 cup almond butter
- 1/3 cup honey or maple syrup
- 1/2 cup rolled oats, ground to flour
- 1/4 cup unsweetened cocoa powder
- 1/3 cup chocolate protein powder
- 1 tsp vanilla extract
- 1/2 tsp baking powder
- 1/4 tsp fine sea salt
- 1/2 cup chopped walnuts, plus extra for topping
Instructions
- Preheat oven to 350°F (175°C). Line a mini muffin tin or use silicone molds.
- In a blender, puree black beans until smooth.
- Add eggs, almond butter, honey, and vanilla. Blend until uniform.
- Add oat flour, cocoa, protein powder, baking powder, and salt. Pulse until well combined.
- Fold in chopped walnuts, reserving some for tops.
- Spoon batter into molds about 3/4 full. Top with reserved walnuts.
- Bake 18–20 minutes until edges are set and a toothpick inserted comes out with a few moist crumbs.
- Cool in pan 10 minutes, then transfer to a rack to cool completely.
- Store in an airtight container in the fridge up to 5 days.
How to Serve It
Serve on a dessert platter dusted with cocoa. Add a dollop of Greek yogurt or a smear of nut butter beside each. Great for lunchboxes or protein dessert buffets. Freeze extra bites on a tray then transfer to a bag for up to 2 months. Warm slightly before serving for a gooey center.
10. Mini Protein Cheesecakes with Almond Crust
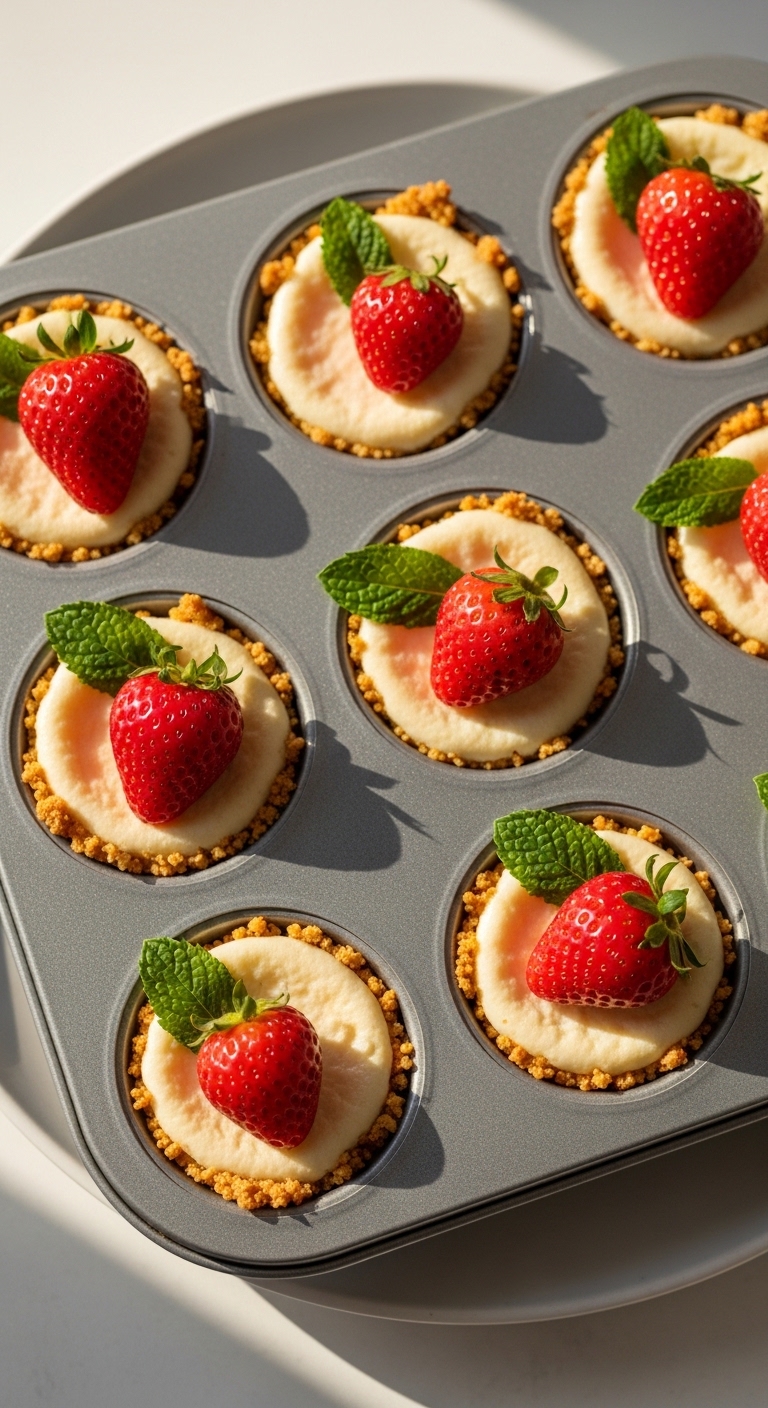
These mini cheesecakes use Greek yogurt and cream cheese plus protein powder to boost protein content while keeping a silky cheesecake texture. The almond crust adds a toasty bite.
They’re perfect for parties, portion control, or elegant desserts. You’ll taste tangy cheesecake filling and nutty crust. The mini size makes them easy to serve.
Prep: 20 minutes | Bake: 18–20 minutes | Chill: 2 hours | Yields 12 mini cheesecakes
Ingredients
- 1 1/2 cups almond flour
- 2 tbsp coconut oil, melted
- 2 tbsp honey
- 12 oz cream cheese, softened to room temperature
- 1 cup plain Greek yogurt, cold
- 1/2 cup granulated sugar
- 1 scoop (about 30 g) vanilla protein powder
- 2 large eggs, room temperature
- 1 tsp vanilla extract
- Zest of 1 lemon
- Fresh berries for topping
Instructions
- Preheat oven to 325°F (160°C). Line a 12-cup muffin tin with liners.
- Mix almond flour, melted coconut oil, and honey until crumbly. Press 1 tbsp of crust into each liner to form bases.
- Bake crusts 8 minutes until lightly golden. Remove and set aside.
- In a mixer, beat cream cheese and sugar until smooth. Add Greek yogurt, protein powder, eggs, vanilla, and lemon zest. Beat until silky and well combined.
- Spoon filling evenly over pre-baked crusts.
- Bake 18–20 minutes until edges are set and centers jiggle slightly. Doneness: centers should be mostly set; a gentle nudge shows slight movement.
- Cool to room temp 30 minutes, then chill 2 hours to fully set.
- Remove liners and top with fresh berries before serving.
How to Serve It
Plate individually with a berry and mint garnish. Pair with tea or a light dessert wine. Store in fridge up to 4 days. For make-ahead, bake and chill up to 48 hours before serving. Freeze without berries for up to 1 month and thaw overnight in fridge.
11. Matcha Protein Truffles (High Protein Dessert)
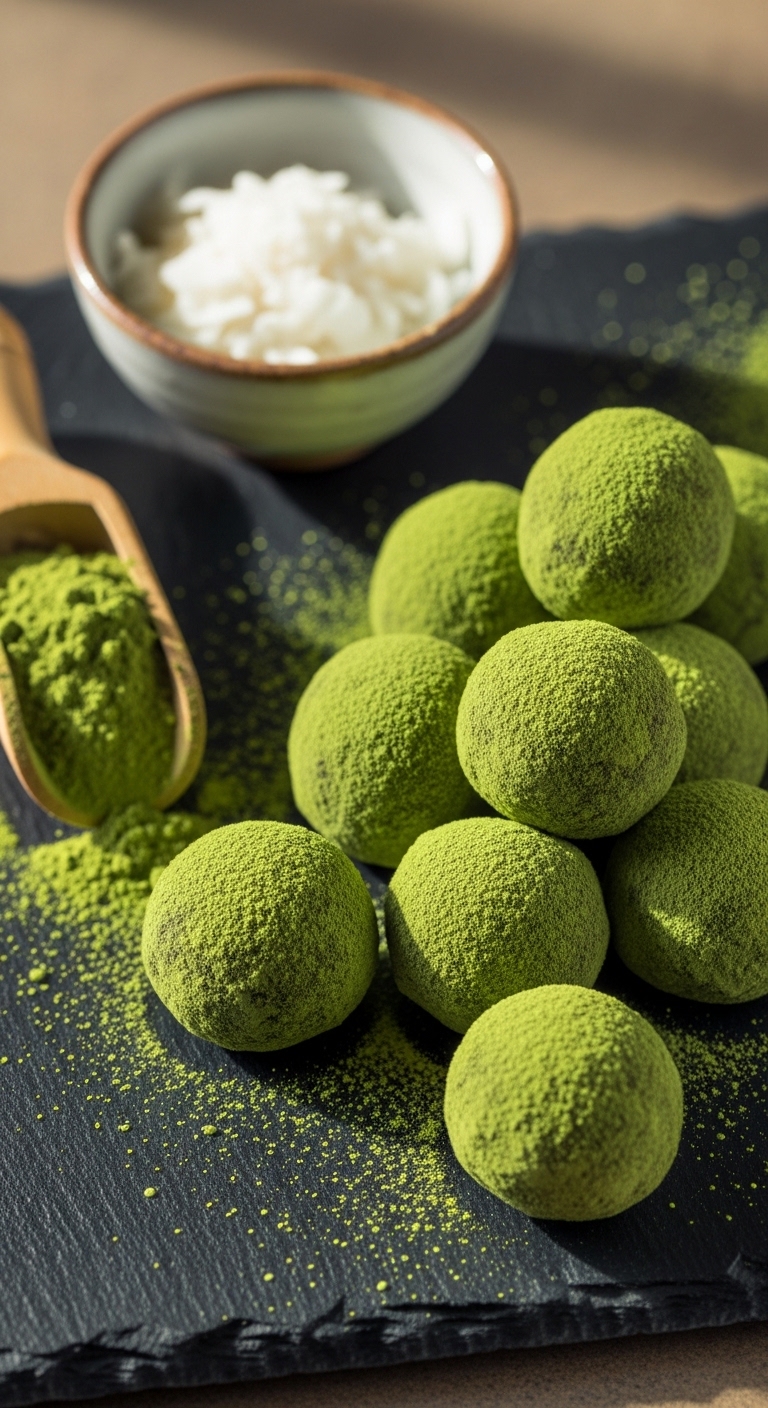
These matcha protein truffles combine white chocolate flavor, matcha, and protein powder for a delicate, earthy bite. They’re easy to roll and perfect for portion control.
They’re great for tea-time desserts, small elegant treats, or a mid-afternoon sweet that packs protein. Expect subtle vegetal matcha notes, creamy centers, and a tender melt-in-your-mouth texture.
Prep: 15 minutes | Chill: 30 minutes | Yields 18 truffles
Ingredients
- 1 cup cashew butter, smooth, room temperature
- 1/4 cup coconut oil, melted and cooled slightly
- 1/3 cup honey or maple syrup
- 1/2 cup vanilla protein powder
- 2 tbsp matcha green tea powder, plus extra for dusting
- 1/4 tsp fine sea salt
- 1/2 tsp vanilla extract
- 1/2 cup shredded coconut, for rolling (optional)
- Optional: 2 tbsp toasted sesame seeds
Instructions
- In a bowl, whisk cashew butter, coconut oil, honey, and vanilla until smooth.
- Stir in protein powder, matcha, and salt until a thick dough forms.
- If mixture is too loose, chill 10–15 minutes to firm up.
- Scoop tablespoon-sized portions and roll into balls with your hands.
- Roll truffles in extra matcha powder or shredded coconut or sesame seeds.
- Place on a tray and chill 30 minutes until firm.
- Store truffles in an airtight container in the fridge up to 7 days.
How to Serve It
Arrange truffles on a small dessert plate with extra matcha dusting. Pair with green tea or a light dessert wine. Great for party favors or small bites after dinner. Keep chilled; they soften at room temperature. Make ahead and store in the fridge for quick protein desserts all week.
12. Baked Oatmeal Protein Cookie Bars

These baked oatmeal bars are chewy, studded with chocolate, and boosted with protein powder. They’re heartier than cookies and keep well for snacks or dessert. They taste of cinnamon, oats, and warm vanilla.
They’re great for breakfasts that feel like dessert or a sturdy snack on busy days. Expect chewy centers, golden edges, and pockets of melted chocolate. Aroma of cinnamon and baking oats fills the kitchen.
Prep: 15 minutes | Bake: 20–22 minutes | Yields 12 bars
Ingredients
- 2 cups rolled oats
- 1/2 cup oat flour
- 1/2 cup vanilla protein powder
- 1 tsp baking powder
- 1/2 tsp baking soda
- 1/2 tsp fine sea salt
- 1 tsp ground cinnamon
- 1/3 cup coconut oil, melted
- 1/2 cup maple syrup
- 2 large eggs, room temperature
- 1 tsp vanilla extract
- 1/2 cup dark chocolate chips
- 1/3 cup chopped pecans (optional)
Instructions
- Preheat oven to 350°F (175°C). Line an 8×8-inch pan with parchment.
- In a bowl, mix rolled oats, oat flour, protein powder, baking powder, baking soda, salt, and cinnamon.
- In another bowl, whisk melted coconut oil, maple syrup, eggs, and vanilla.
- Pour wet into dry and stir until combined. Fold in chocolate chips and pecans.
- Spread batter evenly in prepared pan and smooth the top.
- Bake 20–22 minutes until edges are golden and a toothpick comes out with moist crumbs.
- Cool in pan 20 minutes, then chill 30 minutes for cleaner slicing.
- Cut into 12 bars. Store in an airtight container up to 5 days.
How to Serve It
Serve warm with a smear of nut butter or a spoonful of Greek yogurt. Pair with coffee for a breakfast-dessert crossover. Store bars in the fridge for longer freshness. Freeze individually wrapped bars for portable protein desserts. Ideal for on-the-go snacks or after-workout refueling.
These recipes offer a wide range of tastes and textures—from fudgy brownies to airy mousse and frozen treats. You’ve got quick single-serve options, make-ahead crowd-pleasers, and portable snacks to add protein without losing flavor. Pin the recipes you want to try, start with one tonight, and share your favorites with friends or family. Which recipe will you try first, and who will you make it for?